Upcoming Posts

2/27/2012

Brows! Tools and Tips

             I have gotten a few questions and comments on my brows on what it is I do to shape them and care for them. I used to not like my brows but I am sure we have all been there. Eyebrows really do have a journey. I have over-tweezed them before which made me realize my dislike of thin eyebrows on my face. Also I've gotten my brows threaded a couple times. Although the concept is interesting, I always walked out with a different shape. So learning to care for them myself was my last option. A few years ago a pair of tweezers was my only tool. Now a couple more steps are done and a few more tools are used. I trim and fill in my brows with a powder. Trimming your brows makes such a huge difference because it gets rid of the long hairs sticking out, giving a cleaner look. Because I am currently happy with the shape of my brows I tweeze more often (probably every couple of days). I find it helps my brows maintain that shape. Of course if you want to change the shape of your brows, the most appropriate thing will be to leave them alone and grow them out. 

Tools:
1. A pair of Tweezers (mine are from Avon)
2. Brow trimming scissors
3. Spoolie (mine is from Sonia Kashuk)
4. Angle brush (MAC 266)
5. Brow powder (it does not need to be a powder specifically for brows)


How-To:
  • I begin by tweezing the small hairs on the brow bone and around the brow
  • Then using my spoolie and the trimming scissors I comb the hairs upwards and trim
  • Once I am done trimming I take my 266 brush and the powder and fill in my brows following the direction of the hairs
Tips on Finding the right powder/pencil/pen for your brows:
  • Play with different textures: Playing and testing out different textures such as powders, pencils or pens will allow you to see what compliments your brows best.
  • If you are going for a natural, everyday brow look- powders are great because they give a subtle, softer look. Pens and pencils can help give a more define look.
  • Mixing a powder with a pencil is also a great idea for getting the right shape. 

MAC Coquette, Urban Decay Buck, Milani Brow Kit-Brow 1 and Brow 2

****Currently my new favorite powder for brows is MAC Coquette eyeshadow. The shade is a "muted-greyish taupe" with a satin finish. There is no red, so the color is not warm. I think this shade may work on a variety of skin tones. I am wearing Coquette on my brows on the last few posts.

I hope you found this post helpful in some way :)
Thanks for reading,
Xx-Anel

2/25/2012

Burnt Copper, Oranges, and Feather Lashes!

             Hello my lovely readers! I just got these fabulous Baci eyelashes from my supervisor who has a Baci Lingerie catalog. Baci is an Autralian Lingerie brand which I recently learned about. It is known for its sensual, provocative and fine lingerie. But that is not it. Baci also carries a wide range of lashes, from high fashion styles to the everyday natural lash. 
Baci-Lashes are described as being the "highest quality, largest range and something for every occasion". The lashes are made from synthetic material and an adhesive glue is included in every packaging. I tried using the lashes with their adhesive (which is clear) but they did not want to stay put. So I just used my Ardell lash glue. 
For the selection of shades I went for coppery-orangy colors. I had been wanting to do a look using the beautiful coppery-orange shade from the Tarina Tarantino Dreamy Jewel Palette I recently reviewed. 

Products Used (listed in the order applied):
Face
-Guerlain foundation mixed with Chanel Pro Lumiere 
-Laura Mercier Secret Concealer
-Laura Mercier Secret Brightening Powder
-MAC Blunt Blush
-NARS Blush in Taj Mahal
Eyes
-NYX Jumbo Eye Pencil in Milk on the brow bone
-NYX Jumbo Eye Pencil in Bronze as transition color and eyelid
-MAC Fluidline in Rich Ground all over the eyelid
-Tarina Tarantino Jewel Dreamy Palette- copper-oranger shade was applied all over the lid
-MAC Fluidline in Blacktrack 
-MAC Fluidline Dipdown and Rich Ground were mixed and used above blacktrack
-MAC Ricepaper eyeshadow
-LORAC Front of the Line Pro Eyeliner Pen was lined on top of Blacktrack to make the liner more rich and intense
-Baci Eyelashes
Lips
-Chanel Rouge Coco Shine in Rebelle
Eyelashes- Paradise Dreams No. 604
Check out Baci eyelashes:
www.baci-lingerie.com &
http://www.starlightlingerie.co.uk/

Hope you like the look :)

2/22/2012

Aqua Glitter Look: NYX Liquid Crystal Liner in Aqua and Gold Review & Swatches


Hello everyone! I did this quick look using one my my NYX Liquid crystal liners in Aqua. Since the color is on the blue spectrum I decided to add silver and the china doll eyeliner from Napoleon Perdis. 
Okay so here is a short review on these crystal liners...

What they are: "Just like our Studio Liquid Liner but infused with micro-glitter for a dose of razzle-dazzle. The fine tip allows for precision application, and can be used to create lines of varying thickness. Perfect for when you need to sparkle at a party, or for instant nighttime glitz. Available in 10 shades". NYX 
My Thoughts: One word to describe these, "awesome". I love how quickly these liners add sparkle to the look. I find that layering them on top of a black base allows the color and sparkle to appear more intense. I must admit I did not have high expectations on these lasting on the eyes but was pleasantly surprised. Once they set, they do not move. I plan on getting their silver shade and once I do a look will be posted.

Available at Ulta and NYX website

Aqua, Gold 

Products Used:
-NYX Jumbo Pencil in Milk was used on the brow bone
-NYX Jumbo Pencil in Bronze was used above the crease as a transition color and to warm up the eye a bit
-MAC Blacktrack Fluidline was applied on the top lashline
-NYX Crystal Glitter Liner in Aqua was layered a couple times on the top lashline
-Napoleon Perdis China Doll Liner in Heaven on the lower lashine
-Milani Liquif'eye Liner in Silver 
-LORAC Multiplex 3D Lashes Mascara

I hope you like the look!
Do you have any other NYX product recommendations? Post them below :)

2/20/2012

Green Ivy Shimmer

        Hello! I am back with another post for today. I was not sure where I was going with this look. All I knew was I wanted to use green and gold together and some of my NYX jumbo pencils. Oh and tape! I used scotch tape on the outer sides of the eyes to get a clean eyeshadow shape. I hope you all like the look. 

Scroll down for more pictures, and a list of what I used. 
Products Used:
Lips
-Revlon Lip Butter in Candy Apple
-Revlon Colorburst Lipstick in Coral
Eyes
-Stila Prime Pot in Taffy
-Maybelline 24-Hour Color Tattoo in Bold Gold
-NYX Jumbo Pencil in Horse Raddish
-NYX Jumbo Pencil in Milk
-MAC Goldmine eyeshadow
-MAC Humid eyeshadow
-MAC Vex eyeshadow
-Bobbi Brown Gel ink in Ivy Shimmer
-Milani Liquif' Eye in Gold
-Rimmel eye Kohl in Jungle Green
-Ardell Lashes in # 106

Thanks for stopping by :)
Xx-Anel
A Combination of Mattes, Velvet and Satin finishes

Lately I have been exploring eyeshadows with a matte, velvet and satiny finishes. Shades with these finishes are very work-friendly and can easily be paired with a bright lipstick shade. 

Products Used
Face
-I mixed my Guerlain foundation with Chanel Pro Lumiere and used a foundation brush to apply
-To neutralize the shadows under my eyes I used a bit of BB corrector
-To brighten under the eyes I applied LM secret concealer on top of the corrector
-The concealers were set with LM secret brightening powder
-Guerlain Terracota Bronzing powder was used to define the cheekbones
-MAC Mineralize blush in warm soul on the apples of the cheeks
Eyes
-NYX Jumbo Pencil in milk was used as a base all over the eyelid and brow bone
-MAC Orb (matte) shadow was used as a second shadow base to set the creaminess of Milk
-MAC Texture (velvet) was applied above the crease as the transition color
-MAC Espresso (matte) was blended into the crease
-MAC Shroom (satin) was applied on the lid, the inner corners of the eyes and the brow bone
- I lined my top lashline with Blacktrack fluidline 
- Lashes were curled with E.L.F. eyelash curler and coated with LORAC Multiplex 3D mascara
-Ardell lashes in #53 were applied
Lips
-A couple layers of Hourglass Femme Rouge in Nocturnal was applied on the lips
Hourglass Femme Rouge is reviewed here:


I hope you like the look! If you know of any other mattes, satins or velvets that you really like please share them here :)
Xx-Anel

2/18/2012

Tarina Tarantino Jewel Shadow Palette in Dreamy: Review, Swatches and Look

US $32.00
What it is: "A sparkly eye shadow palette that is like jewelry for your eyes".

Description of shades:
Top- is a mix of coppery and orange tones
Left- a white gold (great for highlighting) 
Right- a soft chocolate brown
Middle- a pale gold 
Bottom- a rich dark brown with bronze sparkles
My Verdict: This has been my first time trying Tarina Tarantino's eyeshadows. I have tried one other product from the brand; their Eye dream hyperliner in sparkling ammunition. Having been well impressed by their eyeliner I had high expectations with their jewel shadow palette. I am glad to say that the palette in dreamy did not disappoint. The packaging is really cute and eye-catching. An oval mirror is included, making it travel friendly. 
The palette includes 5 warm shadows. Looks can be coordinated for day and night depending on the placement of the shadows. All eyeshadows are highly pigmented, blend easily and have long staying power (on top of a base). The only shade that seems to give fallout is the darkest shade in the palette which also happens to be my favorite. It is one of the darkest and creamiest shades I have tried for lining the top lashline. I find that both the lightest shades (left and middle) are beautiful for all over the lid, the brow bone and the inner corners of the eyes. The chocolaty brown shade located on the right side is gorgeous on the crease for a soft look. I like that it does not have any red undertones (I have too many of those). The most interesting color in the palette is the coppery-orange shade. I have used it all over the lid and as a transition color which gave my look a feel of autumn. Overall, I am very satisfied with this palette. And although the shades may seem easily dupable I am most impressed by their quality and shimmery, jewel-like finish. 
Left, Middle, Top, Right & Bottom

 Look 1
Urban Decay Prime Potion
The pale gold shade in the middle was applied all over the lid
The white gold on the left was applied on the brow bone and inner corners of the eyes
The coppery-orange shade was placed above the crease as the transition color
The chocolaty brown on the right was applied on the crease
And the darkest shade on the bottom was used as liner on top of MAC Dipdown Fluidline

 Look 2
Urban Decay Primer Potion all over the lid
The middle shade was placed all over the lid
The left shade was applied on the brow bone and inner corners of the eyes
The right shade was used on the crease
And the darkest shade was used as an eyeliner on the top lashline
Urban Decay in Whiskey was placed on the waterline
Falsies are from E.L.F

Available at Sephora store and website
Thank you all for reading! And more reviews and looks are coming up ;))

2/17/2012

MAC Blushes: Blunt and Margin Review, Swatches and Look

6 g/0.21 oz. 
US $20.00
A contour powder and a brightening blush powder:
What they are: MAC powder blushes are described as "colour for cheeks and face". Their wide range of formulas help create different looks. 
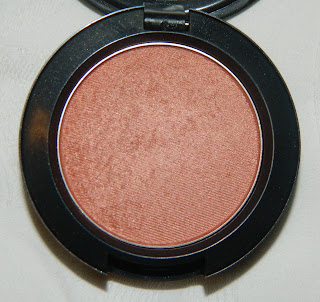
-Blunt is a "muted golden brown" with a matte finish
-Margin is a "peach with golden shimmer" with a frost finish 
Blunt and Margin
My Verdict: MAC has some of the best powder blushes I have tried. Their soft texture, pigmentation and the variety of colors and formulas they carry make their blushes a favorite to makeup artists and the public. Because Blunt has a matte finish, I do not use it as a blush. Instead I use this as a contour powder for defining the cheekbones and/or sculpting the face. One thing I will point out is that the description of the shade is deceiving. When blunt is swatched and applied on the skin, the color has a reddish undertone rather than golden. I personally do not mind that it is a bit red/brown because it does not make my face look muddy. For a finish that is matte, I have had no trouble blending the powder onto my face. 
           Okay, now on to Margin blush! Margin is among one of the popular blushes MAC carries. Many times I have heard people raving about Margin and how flattering it is on many skin tones. However, I always overlooked it when browsing their blushes in store. It wasn't until I asked one of their makeup artists to recommend me a blush I can pair with Blunt. She picked out Margin. After she applied both blushes and blended them I loved the way they looked together. Margin is a peach with golden shimmer and the frost finish flatters blunt's matte finish. 
Blunt and Margin on the cheeks

How-to use Blunt and Margin together: For a sculpted face I recommend using an angle face brush with Blunt. I use MAC 168 large angle contour brush. To locate your cheekbones just suck in your cheeks (do the fishy lips face) and apply blunt diagonally blending upward towards the hairline. Then apply your cheek blush on the apples of your cheeks. Begin on the apples of the cheeks and work the color upwards, blending it with your contour powder. 
Thanks for stopping by :))
Xx Anel

2/13/2012

A look: Tangerine Lips and Dramatic False Lashes

I could not wait any longer so after getting home from work I did a look using some of the products I posted in my last post "New Beauty Products". It is pretty dramatic but can easily be toned down by skipping the false lashes. 
Products Used:
Face:
-Makeup Forever face and body foundation in #6- a thin layer was applied all over
-Bobbi Brown corrector and creamy concealer was used under the eyes to brighten them
-Makeup Forever HD Setting Powder was used to set the base
-MAC Blunt Blush was applied to the cheekbones
-MAC Margin Blush was applied to the apples of the cheeks and then blended into blunt
Brows:
-Milani Brow Fix in Medium was used to shape brows for a fuller look
-Anastasia Clear Brow Gel was applied on brows to set them in place
Eyes:
-Urban Decay Eyeshadow Primer Potion as base
-Tarina Tarantino Jewel palette in Dreamy- (all shades were used except for the copper orange color- the darkest shade was used to line the eyes and the lightest shade was used on the brow bone and inner corners of the eyes)
-E.L.F. Dramatic False Lashes
Lips:
-MAC Lustre Lipstick in Lady Bug

I hope you like the look! And thanks for stopping by ;)
Xx- Anel

New Beauty Products


Happy Monday everyone! Just thought I'd share some pictures of these new items..aren't they beautiful?

-MAC Lustre Lipstick in Lady Bug
-MAC Margin Blush
-Tarina Tarantino Jewel Shadow Palette in Dreamy
-Milani Easybrow in dark Brown
-Maybelline 24 Hour Color Tatoos in Bold Gold and Audacious Asphalt
-Smashbox Photo Finish Luminizing Foundation Primer

Reviews and Looks to Come! 

2/12/2012

A Holy-Grail Product: Chanel Vitalumiere Moisture-Rich Radiance Makeup Review+ Photos


Chanel Vitalumiere Moisture-Rich Radiance Makeup Review & Before and After

                 Some may remember me saying that Chanel Vitalumiere is a foundation that I adore. Since the very first day it came home with me I was in love with its formula, quality of wear and packaging. I don't know why it has taken me this long to finally write a review on this foundation but here it is. I have tried other foundations that have given me great results but I always come back to Vitalumiere when I want my skin to look and feel fresh, natural and pretty.

What it is: 
"The ultimate solution to tired skin, the best-selling CHANEL foundation now instantly revitalizes the complexion upon application and throughout the day. The formula has been updated with new ingredients to specifically target dry, dull and uneven skin, and moisturizing agents to provide hydration and comfort. A marine extracts boosts cell energy to enhance radiance and light-reflecting pigments smooth away imperfections, creating a soft-focus effect. Creamy and luxuriously lightweight, this essential daily foundation blends effortlessly for perfectly smooth, even-tones , radiant skin". -CHANEL

My Verdict: 
A foundation so perfect on you should look like second skin; soft and natural.
The creamy and light texture makes this foundation perfect for daily use. The moisture-rich formulation allows for comfort wear throughout the day plus skin that looks radiant and luminous. If your skin is dry and dull, Vitalumiere will help give your skin life and rejuvenation. 
Just moisturizer on the face except the eyes


Only a pump of Vitalumiere has been applied

Finished look including concealer and setting powder


How-to apply Vitalumiere:  The best tools for this are your fingers. Using my fingers gives me control and helps me blend the foundation evenly into every area of my face. The creamy consistency really helps it blend easily and effortlessly. From time to time I will pick up my foundation brush and use it to apply Vitalumiere, but since brushes tend to absorb foundations quicker, using my fingers would be my first preference. The finish is dewy and fresh so I set it with a loose powder to keep the look soft and for longer-lasting results. 
Shade #50 Naturel
It's Best Qualities: 
  • Moisturizing
  • Creamy Lightweight feel on the skin
  • Light-medium coverage
  • Gives skin a soft-focus look
  • A little goes a long way
  • Blends like a dream
  • Contains SPF 15
  • Has a pump to dispense the product
  • Smells like roses
It's Least Favorable Qualities:
  • The steep price- $55.00/1 oz.
  • Small color range: Only 8 shades available 
Check out this post on a Guide to Finding your Perfect Foundation:
http://blushtree.blogspot.com/2011/11/guide-to-finding-your-perfect.html
Thank you for reading! What is your favorite foundation?

2/09/2012

A Look using Milani Lip Flash Glossy Pencils+ Review/Swatches

First Photo- Wearing Milani Lip Flash in News Flash
Second Photo-Wearing Milani Lip Flash in Photo Flash

 I decided to post this picture so you can see a before and after of the eye makeup
Products Used/Steps
Face:
-After moisturizing my face I applied a thin layer of Chanel Vitalumiere foundation
-Under the eyes I patted Bobbi Brown corrector and then a bit of Laura Mercier Secret Concealer 
-To set concealer and for a bit of a brightening effect I used a fluffy brush and Laura Mercier Secret Brightening powder
-Chanel natural loose powder was applied all over (except under the eyes) with a large powder brush
-Using a angle blush brush (MAC 168) I contoured with MAC Blunt Blush
-Bobbi Brown Shimmer Brick in Bronze was applied on the top of the cheekbones to highlight
Eyes:
-I filled in my brows using Milani Brow Kit 
-I began to prime and correct the lids with Laura Mercier Eye Basics in Buff (a shimmery/subtle champagne color)
-On the lids I patted MAC Shroom eyeshadow 
-On the brow bone and inner corners of the eyes I used the lightest strip of the Bobbi Brown Shimmer Brick in Bronze
-Then taking my bent eyeliner brush I lined my eyes with E.L.F. cream liner in Midnight
-I coated my lashes once with Prestige My Biggest lashes Mascara
-Ardell Accent Falsies in #301 were applied
-LORAC Multiplex 3D Lashes mascara was used on the lower lashes
Lips:
-Milani Lip flash in News Flash 02
-Milani Lip Flash in Photo Flash 04 
 Now for the quick review on Milani's Lip Flash Full Coverage Glossy Lip Pencils
Both lip flashes are opaque and deliver full coverage wear. They contain glitter but I do not find them to be drying or feel uncomfortable on my lips . However, I do find that News flash is creamier and easier to apply than Photo Flash. This may be because the glitter is more obvious on Photo Flash. In terms of lasting power I find that both have a good average wear (2 + hours) before the color begins to wear off. Overall, I am very happy with these lip pencils because they are pigmented as a lipstick with a glossier and glittery finish that does not look cheap. 
Available at Target and drugstores/ $6-7.00 each 
Photo Flash 04 (left) News Flash 02 (right)

Thank you for reading and stopping by :)